Today was day 1 of my photography course with the British Academy of Photography and I have spent it learning about camera fundamentals, the first module of the unit.
I have heard of all of the terms (aperture, exposure, shutter speed, ISO, metering) when doing photography with Trys and was aware of some settings adjustments I needed to make in order to achieve certain looks, but I wasn't sure about the reasoning for this. But when I sat down and focused, all of the resources were so clear and detailed (particularly the video tutorials) that by an hour or so into my day I felt like I had somewhat gotten to grips with some of the fundamentals of a DSLR camera. They had some really useful images, which really helped me to understand the meaning of each term and how they work individually as well as together.
I'd like to use my blog to document my photography course journey, share any useful notes, tips, or tricks, and post images I'm proud of. Below, are my notes from today.
Aperture adjusts the depth of field and the amount of light that is let into an image (i.e. the opening of a lens’ diaphragm through which light passes)
Note: Aperture ranges vary from lens to lens. With one single lens, the aperture range can also vary, depending on how zoomed in the lens is.
Image 1 - Lower F Stop (F1.4)
A larger aperture and, therefore, lets more light in
Has a shallow depth of field (i.e. one main focus with blurred background)
Image 2 - Higher F Stop (F16)
Has a smaller aperture and, therefore, lets less light in
Enables a deeper depth of field
Keeps everything focussed and sharp (i.e. ideal for landscape photographs or starbursts)

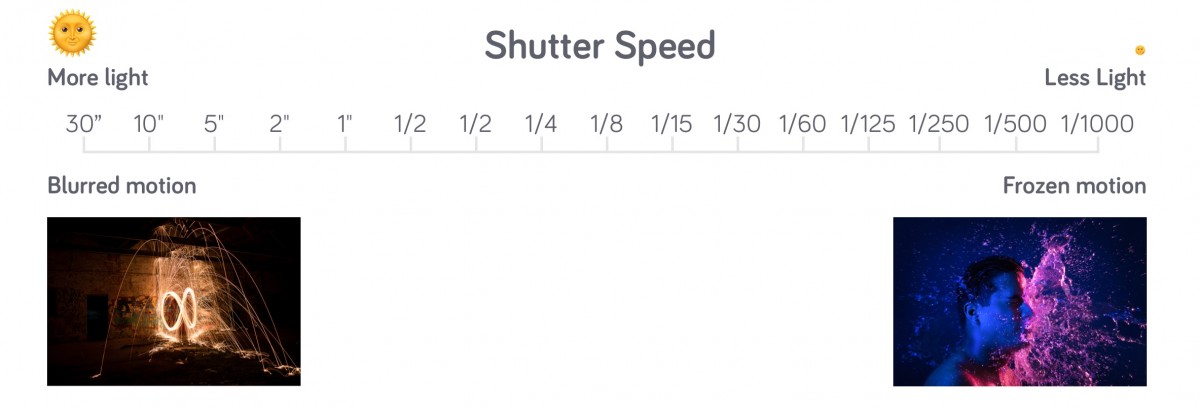
Shutter speed refers to how long the shutter is open for (i.e. 1 second, 1/4000th of a second) and adjusts how sharp or blurred the subject’s movement is. It can also be used to adjust how much light is being let in. A shutter speed of 30 seconds will let in a lot of light, and will, therefore, be ideal for a starry night sky.
Light - A shutter speed of 1 second or more will let in more light than a shutter speed of 1/4000
Sharpness - A shutter that is open for less time (i.e. 1/4000), will give a sharper image (useful for freezing motion)
Freezing Motion - If you want to freeze the motion of a moving object, you need to use a shutter speed that's as fast or faster than whatever motion is occurring.
Blurriness - A shutter that is open for a longer amount of time (i.e. 1 second), will give a blurrier image (i.e. sparklers, light painting)
Adjusting the shutter speed should be prioritised over the ISO in order to create a balanced exposure and reduce the noise.
ISO defines how responsive or sensitive the camera is to light. ISO can be adjusted to alter the exposure of an image when you do not wish to alter the aperture and shutter speed settings (i.e. for stylistic reasons). It’s best to adjust the ISO after you have adjusted the aperture and shutter speed as ISO does not alter anything stylistically.
Note: Increasing the ISO can begin to introduce unwanted noise / visual distortion (this may not always be visible on the camera screen, but may be noticeable when on a larger screen ( i.e. when editing).
When taking photographs, you will have an idea of what you are aiming for in your mind. If you wish to have a shallow depth of field, you will want to focus on getting your aperture correct, and then using the shutter speed to balance out the exposure. However, if you are aiming to capture movement, the shutter speed will be the priority and you will need to adjust the aperture and potentially the ISO too. You should only need to adjust the ISO to accommodate the adjustment of the other 2 settings, the ISO will not alter the style of the photo.
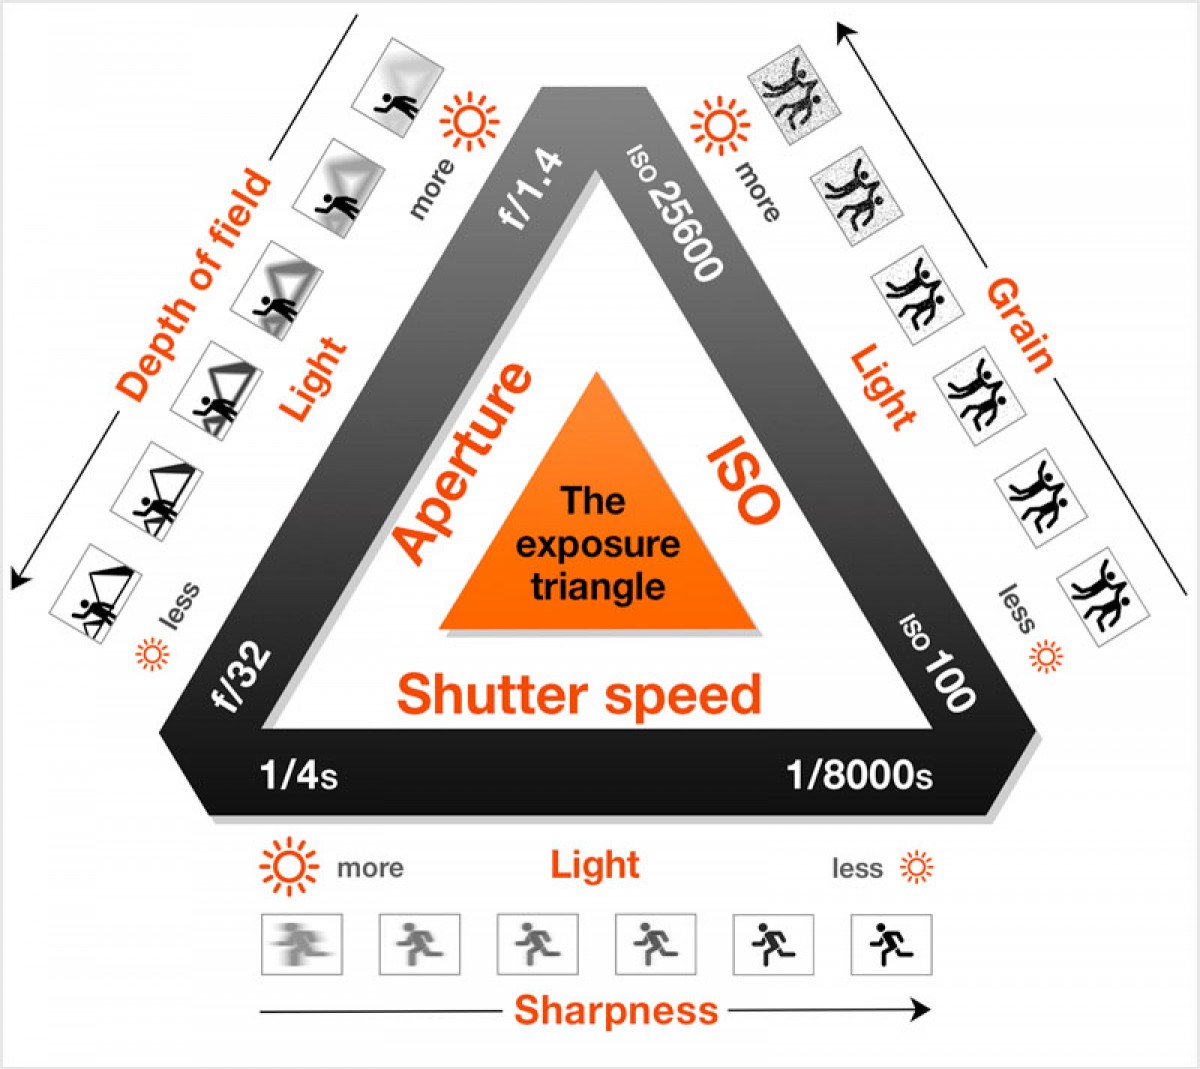
The above triangle demonstrates that by adjusting one of the 3, at least one of the others will need to be adjusted too in order for the exposure to be optimised.
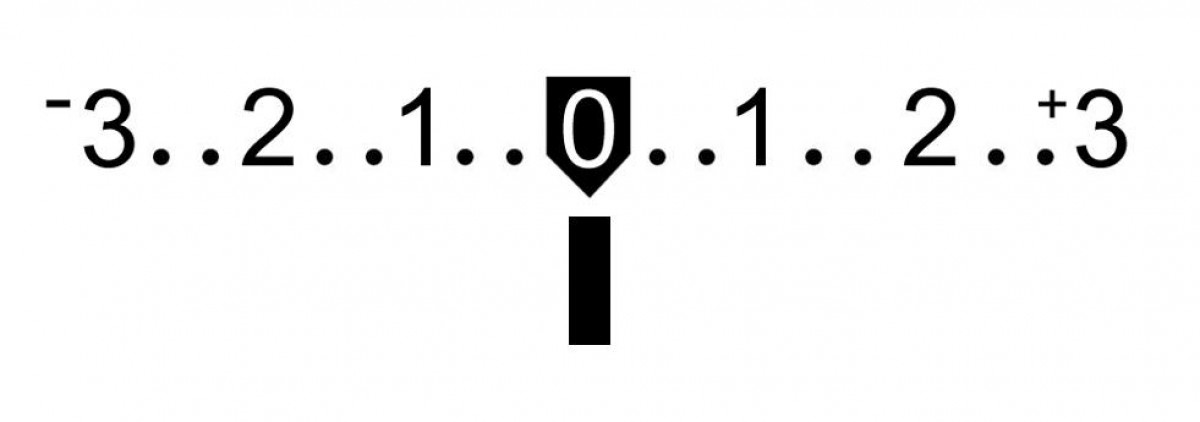
You can use the light meter on the camera to check the exposure of the photo. As you adjust the aperture, shutter speed, or ISO, the light meter will indicate whether the image will be under or over-exposed. If you know what composition you are working towards, you can first choose that setting (i.e. high F-number for a starburst), and then adjust the others accordingly to get the light meter on or as close to 0 as possible for the ideal exposure.
Metering is used to measure the brightness of the subject of your photograph. Here is a useful explanation by Nikon. You can access the metering mode settings by pressing the metering mode button on the camera.
Evaluative / Matrix Metering - this tends to be the default metering mode for most cameras. This type of metering divides the sensor into zones and reads the light across them all, before coming to an average light reading. This type of metering is best used when the light is fairly consistent (i.e. not some areas of overly dark or light sections in an image). Evaluative metering is used when the subject occupies the majority of the scene (i.e. landscape).
Center-weighted Metering - this type of metering reads light across the whole screen but prioritises light in the centre of the screen. This is best used when the subject is central in the photograph and occupies approx. ⅔ of the scene.
Spot Metering - this type of metering only measures 5% of the light in the scene. Readings are taken from the point on which you focus your camera. It’s ideal for high-contrast scenes, where you aim for a specific area to be ‘correctly’ exposed.


